Friday, November 19, 2010

Keller_Website

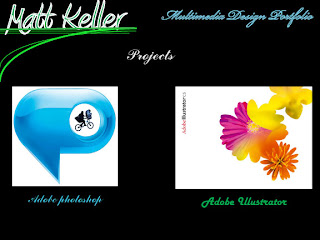
This is my projects page explaining what software we will be using.


Step 4: For this project i wrote out projects. I did this because it is discussing and explaining what softwares we will be usuing and i bought up two images that relate to Adobe Illustrator and Photoshop

This is the class overview

Step 3: I wrote class overview and i began telling what the class is about and briefly described how the class is run, and what is taught in it.

This is my Biography
Step 2: I wrote bio, then began writing a brief description about myself and what school im enrolled in.


This is my homepage


Step 1:I took an image of a football shrunk the size of the image, then i drew a box around the image and made the background color black. After that i thenAdded in text buy making different lines with the line segnment tool and then wrote on the line with different fonts and font colors. I also changed the stroke of the text to make it stand out

Tuesday, November 2, 2010

This is the 4th image we did.


Step 1: I took the image and uploaded a picture of a hawk and the statue of liberty.

Step2: I took the images and adjusted the size of them then used the move tool to move them onto the panther image.

Step 3:I then used the eraser tool and cut out all the other thing in the uploaded photos, after that i used the blur tool and put them in a good place to blend them into the image and it doesnt look all chopped up.


This is the 3rd image we did.


Step 1: Mia took the image and added a cat into the panthers mouth.

Step 2: Mia did this by uploading a image from google and then used the magnetic lasso.

Step 3: Mia then changed the size of the image of the cat and dragged it into the mouth of the panther.


This is the secong image of the panther.


Step 1:After i finished the first steps Mia then took the image and found a cat and uploaded it

Step 2: Then she adjuasted the image size and used the eraser tool to get out all the messed up edges.

Step 3: Then She dragged the cat into the panthers mouth and used the blur tool to blur out any bad spots.

Step 4: Mia created a feathered edge by using the rectangular marquee tool and drew a box around the image. she then clicked on select then inverse and chose black and after this she hit cut then the image had the black feathered edge.


This is the original image of the panther.


Step 1: I chose a background to put the panther in instead of the plain gray.

Step 2: I used the magnetic lasso tool to cut out the panther.

Step 3: I then used the move tool to drag the panther into the sunset background i chose.

Step 4: After i placed the image onto the background i shrunk the image size.

Step 5: I then used the eraser to fix any edges i messed up on and also used the blur tool to blend in the spots i missed.


Thursday, October 28, 2010

PHOTOSHOP: magnetic lasso


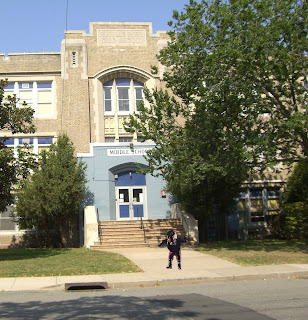
I selected images first to do this I chose to use our towns middle school and the leprechaun from horror movies. I first resized the leprechaun to make him look his actual size and had to use the magnetic lasso to get rid of all the other things in the original image. I also resized and magnetic lassoed the middle school picture and after this I cropped the image. Then I used the move tool and moved him in front of the middle school and then I was finished.

PHOTOSHOP: layer mask


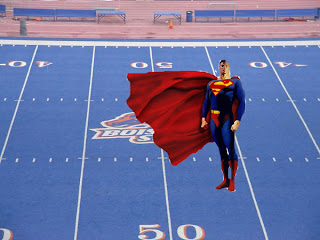
To do layer mask i had to use the magnetic lasso to cut out superman and then upload him and Boise st. football field. Then I resized the image and used the move tool and dragged superman onto the field. Then I used the eraser to get rid of the white soaces and I used the blur too to hide some messed up edges and then I was done.

PHOTOSHOP: feathered edges


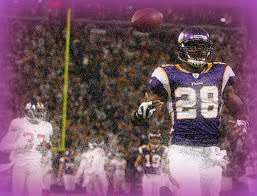
In this image i uploaded a picture of my favorite NFL player onto Photoshop. Next i began to look at different filters and chose texture, grain. Then i made my feathered edges by selecting the rectangle marquee tool and selected the image. Then i clicked on select, inverse and then clicked on edit cut. Then i chose a color for the fade in on my feathered edges and i was done.

Thursday, October 14, 2010

KELLER_Flyer


The elements and principles of design I used to create my awesome flyer, were adding and combining shapes, shapes tool, text on a path, and text tool. I also used different fonts and strokes to emphasize my flyer. The first thing I did to my project was I clicked on the line segment tool and selected the spiral tool. After that I began typing powder puff which is what I’m advertising. After that I chose a font stroke and the color of the font. After this I then started to make my footballs. I used the arch tool and made to arch’s connecting in a football shape and painted it brown. I then drew lines looking like laces to a football highlighted them and dragged them over the football. After this I did two lines to make the white stripes on the ends of the ball. I then copied and pasted another football and rotated it 45 degrees.
The second half I my flyer I used text on a path on a line and wrote out my information explaining when and where the event takes place. Then I changed the font and stroke colors along with the size of the font. I also made a panther paw by drawing an ellipse circle then drew another one on top of it and clicked on subtract from shape area then I drew 3 circles to make t look like the toes of the paw. I then changed the stroke size and color of the paw to our school colors.
Furthermore I used many of the elements of design I have learned in this class and tried to tie them into this project. I used many of them such as using the stroke and fill colors along with the font and size of it. I also used text on a path, type tool, adding and subtracting shapes and made shapes.

Tuesday, October 5, 2010

ILLUSTRATOR: Text on a path_my name

To do clipping mask with you name click on the line segment tool the select a line to create so that you can write your name. Then once this is done you click on the type tool then select text on a path. Then you will type out your name and after that you can change your text by changing the font, font size, stroke, and color of the text.

Wednesday, September 29, 2010

ILLUSTRATOR: Snowflake


To make a snowflake you click on the shapes tool then select the polygon tool. Make 2 oly gone one rotated 90 degrees and the other one normal and lay them ontop of eachother, then select the rectangle tool and make 4 rectangles and rotate 2 of them one 45 degrees the other -45 degrees. Once this is done lay then ontop of your polygons in a snowflake pattern then click on the slection tool and click on the shape and hit subtract from shape area and then you will have a shape that looks like a snowflake.

ILLUSTRATOR: Text on a path


In order to do text on a path you begin by clicking and holding the line segment tool until you get a selection of lines you then click one that you like in this one i chose the arch tool. Once chosen you can then click on the type tool and hold it down until you get different selections of ways to type,you wanna look for the type on a path tool then when thats selected you click on the arch you made then can begin typing after you type out what you want you can right click and change the stroke and stroke color along with the font and the size of the font.

ILLUSTRATOR: Clipping mask_name


to do clipping mask with your name first you will click on the type tool thenw rite out your name. Once you have done this you can right click with your mouse and change the font, size, and the stroke. When this is done you can then go to your selected photo and upload it onto adobe illustrator ; adjusting the size of the photo also to how big or small you want it. After that you can then click on your text and drag it over any part of the photo to your desired spot. When this is complete to finalize the clipping mask you'll select the image and text then click on object go down and click on clipping mask then hit make and you will have a clipping mask done with your name.

Tuesday, September 28, 2010

ILLUSTRATOR: Combining shapes


To combine shapes you have to click on the shapes tool and select the shape you wanna make. In this one i selected the rounded rectangle shape and the star shape. I then change the color of the shape along with the stroke color and size. To begin combining them you select the shaped and arrange them ontop of the shape you want to combine it with. you will then click and select the shapes and will click on window go down and you will see pathfinder then you select that. After this you will then highlight your shapes and click on add to shape area and then your project will be done.

ILLUSTRATOR: Clipping mask


First i started by clicking on the type tool i then wrote out Ultimate Fighting Championship. After this i then right clicked on the text and changed my font, the size of the font, and the color of the text and stroke color. After all of the text is complete i upload the image onto Adobe Illustrator then i fix the size of the image i then click on the text and drag it over the picture. After this has been complete you will then click on object go down and select clipping mask then click on make after this your clipping mask is complete.

Monday, September 20, 2010

Welcome!

Hi! My name is Matt keller and i will be usuing this blog as a portfolio for my Multimedia Design class. I will be posting my projects and examples along with a brief description of what i did. Please chech back to see my work!